There was a design flaw with this DIY gel holder and I sincerely apologize. See Simple DIY Gel Holder version 2 for the flaw description and updated design.
DISCLAIMER: As with any Do-It-Yourself (DIY) project, unfamiliarity with the materials, tools and processes can be dangerous. Posts here should be taken as theoretical advice and you perform these DIY projects at your own risk. The author will not be held responsible for any injury or equipment damage arising from any DIY project posted on AroFarMeR.
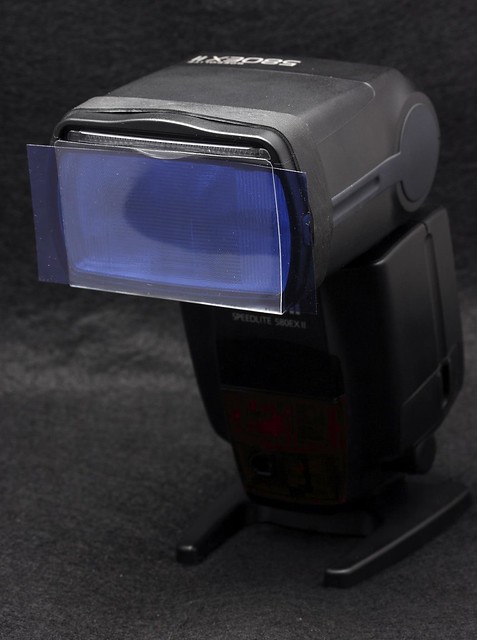
I got myself Rosco's "The Strobist Collection" 55 piece Cinegel Filter Kit and I need a gel holder for my Canon 580EXII flash unit.
Did some research online for almost all the commercial and creative DIY designs currently available:
GelHolder.com
LumiQuest FXtra
How to make a simple strobe gel holder
DIY Flash Gel Holder
Studio DIY: Gel Holder for Flash
Lighting 101: Using Gels to Correct Light
DIY Flash Gel holder
DIY Flash Gel Holder & Storage
DIY Flash Gel Holder
DIY flash gel filter holder-Quick and easy
How to build your cheapo lighting modifier system
Who Says DIY Gear Looks Cheap?
I finally settled on my own design consideration:
- Must keep gel in place on the flash unit (obviously!)
- Must allow easy insertion and fast removal of gel
- Must allow use of the 580EXII original built-in wide panel and catch-light panel without obstruction
- Must be compact on the flash unit so that it will not hinder any possible add-on (e.g. a flash diffuser, bounce card, grid, etc)
- Must be compact to just leave it on the flash unit without having to remove for pouch storage
First, get a piece of simple clear plastic - I suggest reusing clear plastic packaging. Got this from my purchase of a screen protector for my hand phone. Just make sure the plastic is not too flimsy as we need it to hold up our gel, or too hard because we need to bend it without breaking.
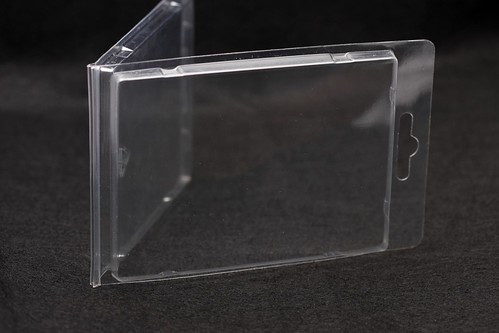
For easier working, cut out the main plane of the plastic to be used. Cut the plastic using only the middle of the scissors for a smooth edge. Using the tip of the scissors will cause the plastic to break along the edge as shown below:

Place the plastic over the flash head and trace the dimension of the flash head using a highlighter. (its easier to wipe off the highlighter markings with a cloth later). Leave about an inch for the bottom part of the holder.
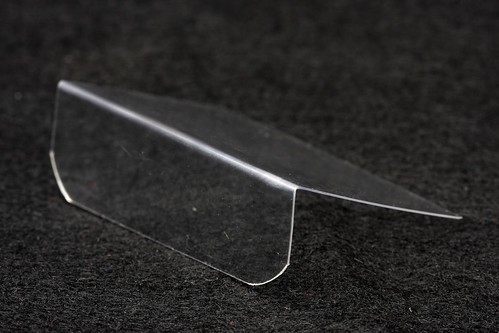
Cut the plastic to size and bend to shape. Trim the sharp corners of the plastic holder using scissors or a nail clipper. This is how the gel holder should look like:
Place the gel holder onto the flash head and secure it using a rubber band around the flash head. I use the black rubber band that came with my Gary Fong Lightsphere Universal diffuser...
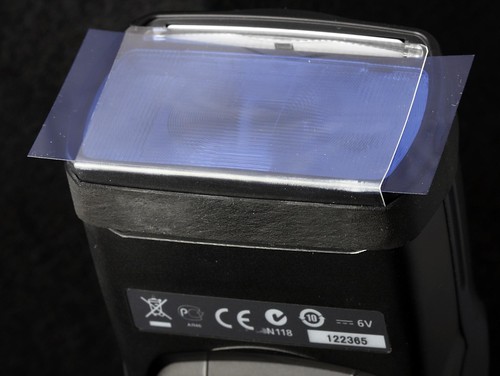
To insert the gel, just run the corner of the gel along the small gap between the gel holder and the flash head, then slide the rest of the gel firmly into place:
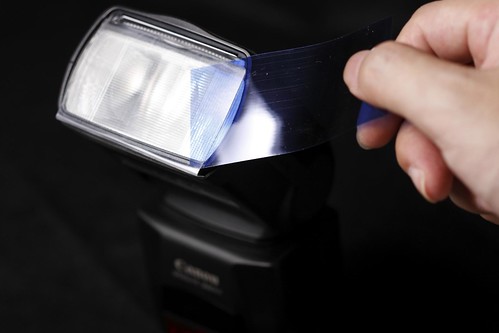
The gel will sit nicely in place throughout the use of the flash. As seen in the below picture, the gel will have some extension on the sides of the gel holder/flash unit. For removal, just grab the extended gel and pull it out.
Design Notes:
I decided to attach the gel holder via the bottom of the flash head because the bottom edge is much straighter as compared to the top which is of uneven shape. Also, in attaching the gel holder via the bottom of the flash head, the original built-in wide panel and catch-light panel can still be used without obstruction.
In addition, the gel holder is completely flushed with the flash head so any add-on like a flash diffuser, bounce card, grid, etc can be easily added to the flash unit without any problem except for one... the extended gel itself.
Solution is to trim the gel down to size but always remember to leave a small gel extension so that you can easily grab and remove the gel from the holder.
No worries even if the gel is trimmed down without an extension because the gel holder can be quickly detached to remove the gel and re-attached almost instantly for the next gel.
Hope you like this simple yet useful gel holder design and make one for yourself. It really cost nothing except for your time in getting the material and making it.
Enjoy!
Shooting Notes:
Camera Body: Canon 40D
Lens: EF 100mm f/2.8 USM Macro with Hood
Mode: Manual - Av @ 4 ~ 11, Tv @ 125
ISO: 100
Focusing: Manual
Tripod: Manfrotto 190XPROB
Ball-Head: Slik 800 Quick Release
Flash: Alien Bees B800
Light Meter: Sekonic Flashmate L308BII
No comments:
Post a Comment